Command to Make Number Continuously at Once in Autocad
Introduction to Layer Command in AutoCAD
AutoCAD is a computer-aided designing software that works with a different type of 2d and 3d command of it for making its work easy. We also have some different features in this software which helps us for making detailing in our drawing work. Layer command is one of the features through which you can highlight detail in your drawing work. So in this article will discuss the Layer command and its important feature for understanding its different parameters. So let us start our discussion about this topic.
How to Use Layer Command in AutoCAD?
We have different features and parameters in the layer command through which we can add detailing in our drawing. We will discuss all major features of layer command one by one with an example. But before learning this command, let us have a look at the working screen of this software so that we can better understand this topic.
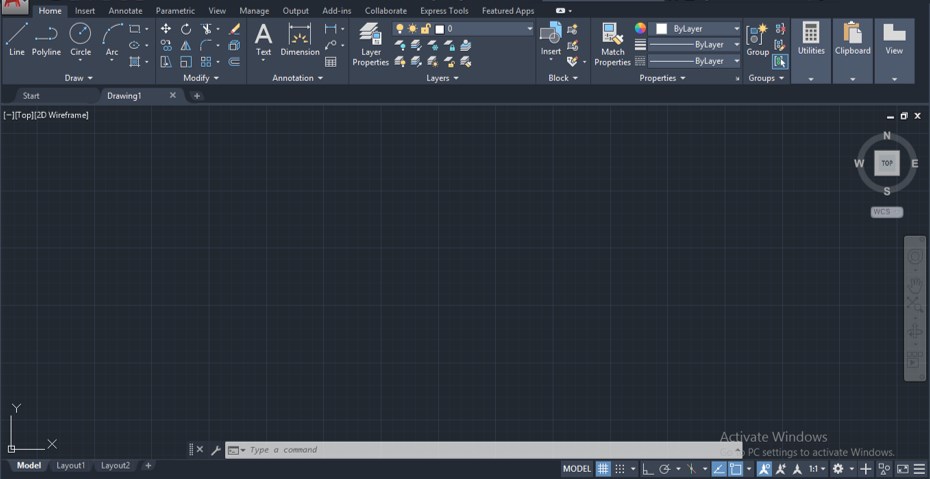
Step 1: At the top of the working screen, there are ribbons which have a number of tabs such as Home tab, Insert tab, View tab, Express Tools, and some others for handling different commands of this software; below this, we have a working window in which we can see our current work, below this window we have some navigation command which helps in our working during making drawing work in it.
Step 2: This is the Layer menu of the Home tab from which we can set parameters of layers according to our requirement.

Step 3: Now click on the Layer Properties option of the layer menu of the Home tab of this software.

Step 4: Once you click on this option, a dialog box for setting parameters of the layer will be open, which is named as Layer Properties Manager.
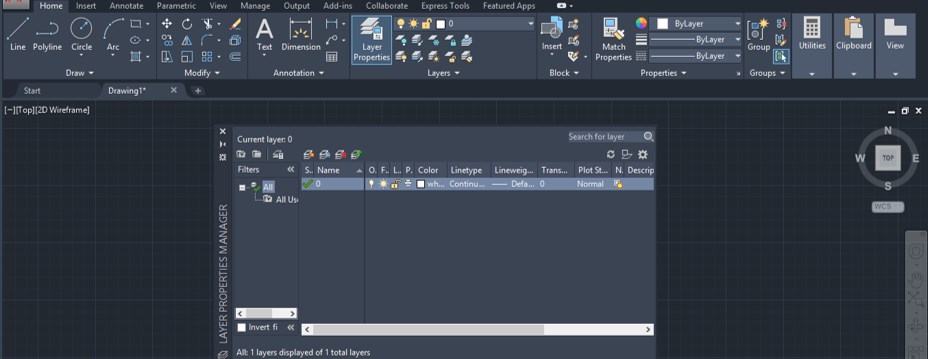
Step 5: Now, let us understand all options of this dialog box for understanding layer command. By click on this button, you can add a new layer to this dialog.

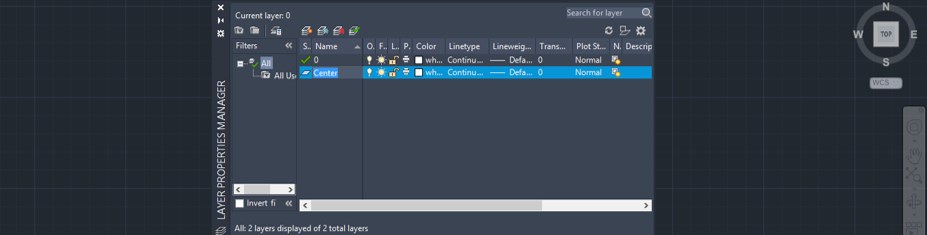
Step 6: Once you make click on this button, a new layer will be added in the table section of this dialog box.
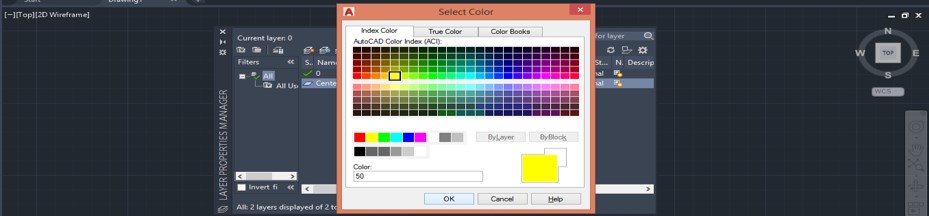
Step 7: By clicking on the cell of the Color column of your selected layer, you can change the layer's colour.

Step 8: Once you click on this cell, a color selector box will be open. Choose your desired color from here and press the Ok button of this dialog box. For example, I will choose yellow as my selected layer color.
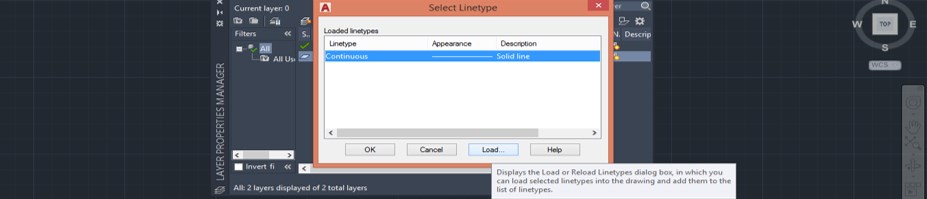
Step 9: Now, you can choose line type such as you can take center line, continuous line, and some other engineering drawing line for specifying the purpose of that line, for setting line type click on the cell of the Line type column of this table.

Step 10: Now, a dialog box will be open for selecting line type. If you have chosen different line types in your previous work, you will see your chosen line type here in this list. If you can see different line types, you have to load them according to your drawing requirement. So click on the 'Load' button of this dialog box for loading new line types.
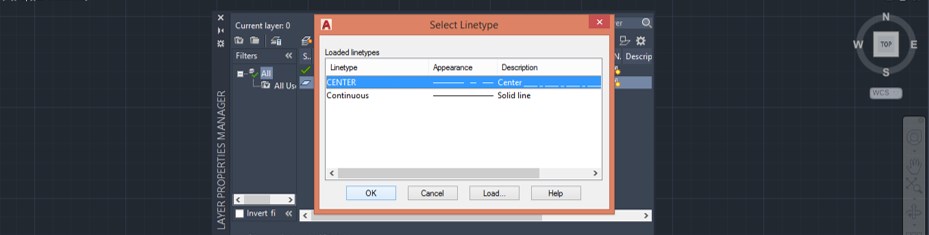
Step 11: Now, search here your desired line type. I will choose this Centerline as a line type of my selected layer and then press the Ok button of this dialog box.

Step 12: Now, your chosen type will load in your loaded list of line type here. Now click on your desired line type for selecting it, then press the Ok button of this dialog box for making your chosen line format as the line type of your layer.
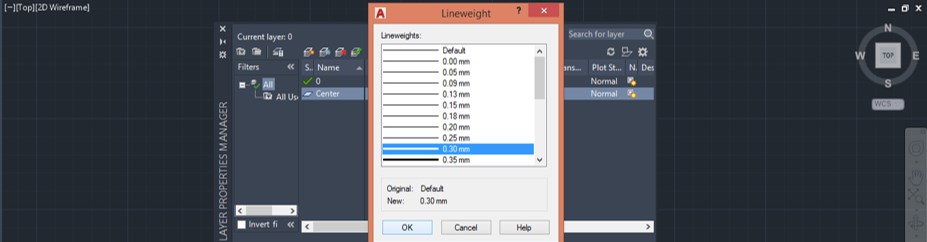
Step 13: Now, if you want to change your chosen line's thickness, click on the cell of your selected layer of Linewieght column of this layer table.
Step 14: Once you click on this cell, a dialog box for choosing Line thickness will be open. Now you can choose the desired thickness of your selected line from the list. For example, I will choose 0.30 mm from the list.
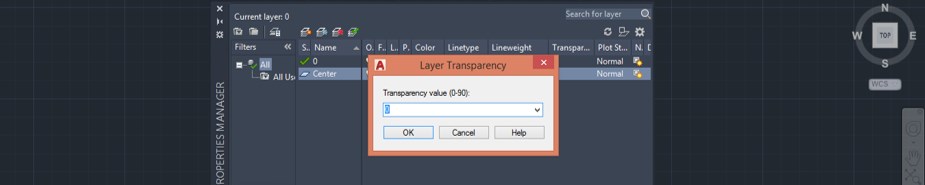
Step 15: You can set the transparency of your line of the selected layer from the transparency column of this table.

Step 16: Click on the cell of the transparency column of the selected layer, and a dialog box will be open. Enter the value of transparency of line from 0 to 90 %.
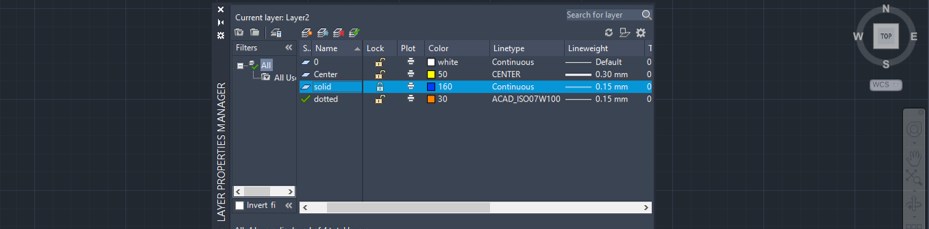
Step 17: Now, let us add some layers of different properties by following the same steps as we did previously.
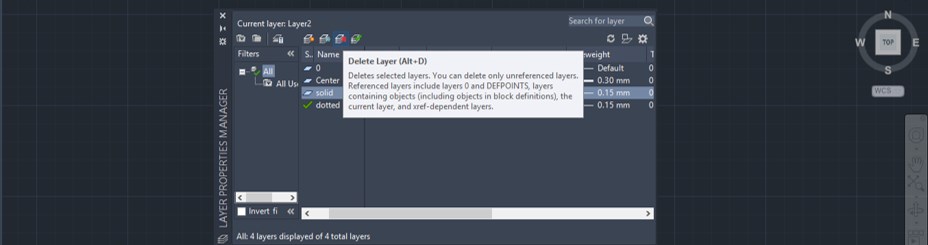
Step 18: If you want to delete any layer from this table, then select that layer, then click on this delete button for deleting it.
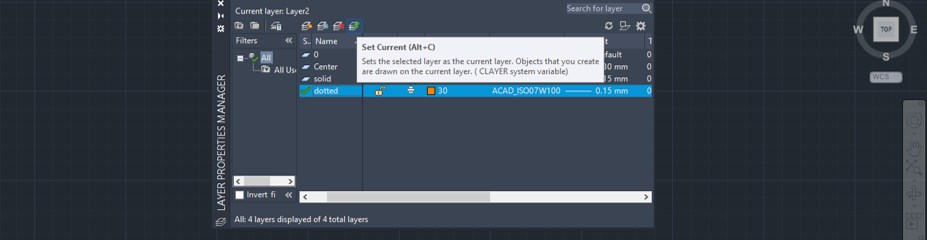
Step 19: You can choose any layer from this table as a default layer for your work. For setting any layer as your default layer, select your desired layer which you want to make default, then click on this button, and your selected layer will set as the default layer in your work.
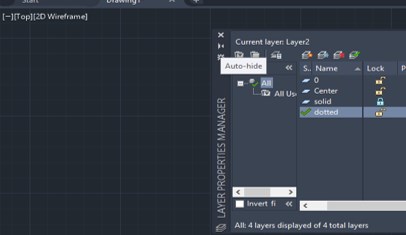
Step 20: You can hide this dialog box by this Auto-hide button of this dialog box and quickly use this layer table again and again in your drawing work according to your requirement.
Step 21: You can use your created layers from this option also. Just click on the drop-down arrow button for seeing a list of layers.

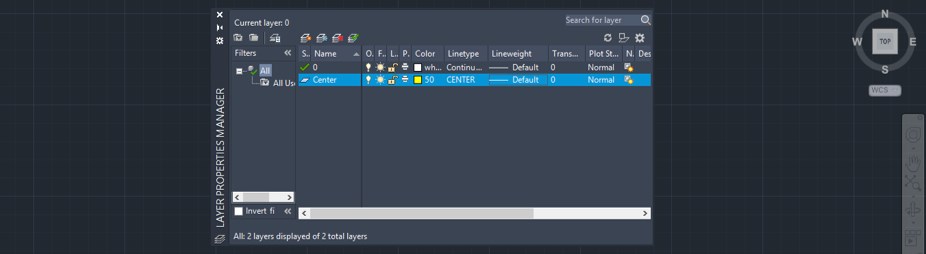
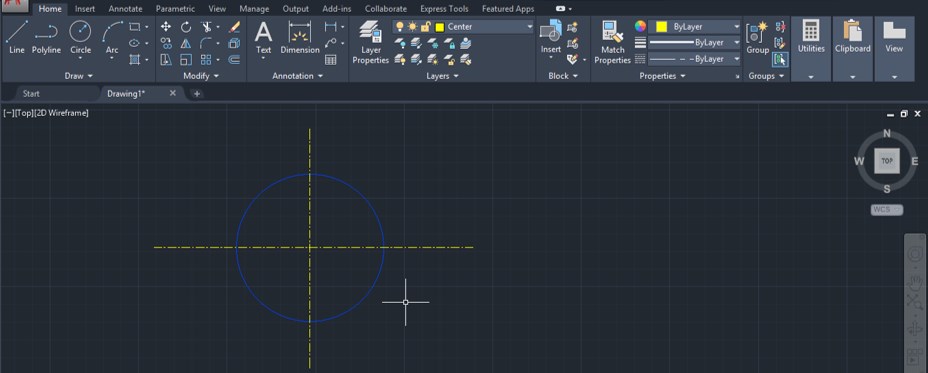
Step 22: Now, let us make a drawing by using different layers of your layer table. I will select a solid layer, then draw a circle like this; then again, I will change my layer style to center layer by selecting the center layer from the layer list and draw this centerline. In this way, you can make a drawing with different layers and layer styles.
Step 23: By click on this bulb icon, you can hide your selected layer.
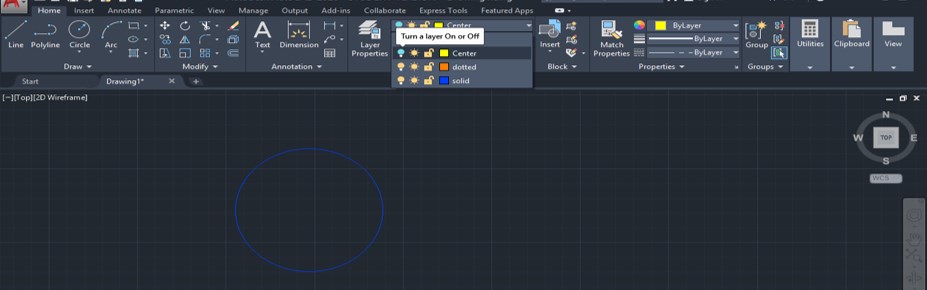
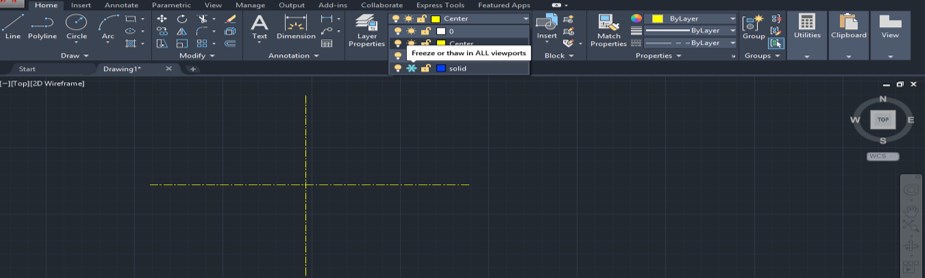
Step 24: You can freeze your layer if you don't want to change it by clicking on this sun icon.
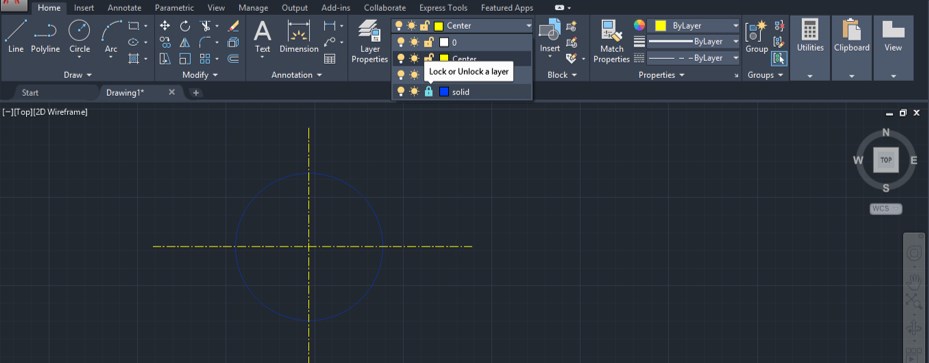
Step 25: You can lock your selected layer if you don't want to disturb it during your work by click on this lock icon.
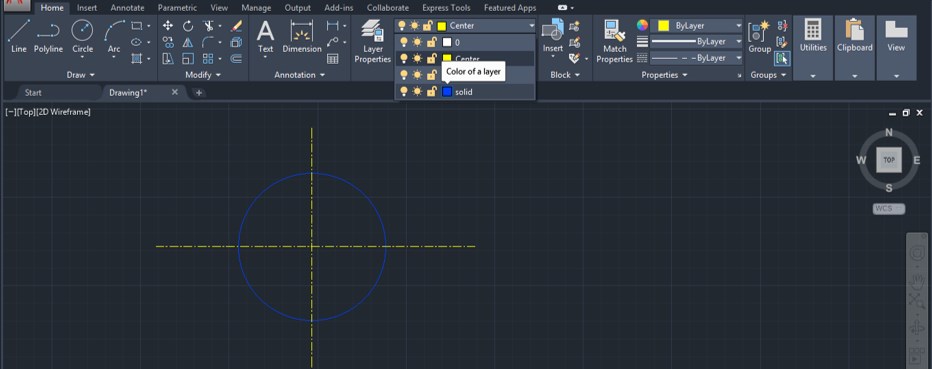
Step 26: You can change the color of your layer at any time of your work by click on this small color box of your selected layer.
Conclusion
Now, after this article, you can understand what layer command in AutoCAD is and how you can handle important parameters of this command for adding detailing in your drawing work. You can make better use of this command by practicing on it again and again.
Recommended Articles
This is a guide to Layer Command in AutoCAD. Here we discuss the introduction, how to use Layer Command in AutoCAD in a step by step manner. You can also go through our other related articles to learn more –
- AutoCAD Units
- AutoCAD 3D Rotate
- Muebles AutoCAD
- Hatch AutoCAD
bullenhernione1971.blogspot.com
Source: https://www.educba.com/layer-command-in-autocad/